EasyTricks - For Life

    Social Items

Hello Viewers It's Been A Long Time Since I Haven't Shared Any Post. Now I am Sharing A Post That Will Make Your Blogger Post Super Cool. Now Lets Get Started.


This wigdet is inspired by the Newspaper Wordpress theme, where you can see the example image below.


Image By Bosjn


How to Make a Simple Author Box Follow The Steps ↓

Open Blogger > Dashboard > Theme > Edit HTML


/* AUTHOR POST PROFILE */
.author-profile {overflow: hidden;margin-bottom: 10px;padding: 24px;line-height: 1.5;border: 1px solid #ededed;}
.author-profile-url {font-size: 11px;font-style: italic;line-height: 21px;margin-bottom: 6px;}
.author-profile-url a {color: #444444;}
.author-profile-url a:hover {color: #2ec4f2;}
.author-profile img {border: 0;padding: 2px;width: 96px;float: left;margin-right: 15px;}
.author-profile > span {font-size: 14px;color: #222;}
.author-profile a.g-profile {font-weight: 500;color: #222222;font-size: 15px;margin-bottom: 5px;display: inline-block;}
.web-author-url a:hover, .author-profile a.g-profile:hover {color: #4db2ec;}
.web-author-url {font-size: 11px;font-style: italic;line-height: 21px;margin-bottom: 6px;}
.web-author-url a {color: #444;}
.author-social {margin-bottom: -5px;}
.social-links li {list-style: none!important;float:left;}
.social-links a {border-bottom:none;}
.social-links li a {font-size:18px;color: #222;width: auto;min-width: 18px;height: auto;margin-right: 15px;}
/* SVG ICON SOSIAL MEDIA */
.author-profile a.g-profile:after, .comments .comments-content .icon.blog-author:after {
content:'';width:15px; height:15px; vertical-align:middle;display:inline-block;transition:all 0.3s ease;background: url("data:image/svg+xml,<svg viewBox='0 0 24 24' xmlns='http://www.w3.org/2000/svg'><path d='M23,12L20.56,9.22L20.9,5.54L17.29,4.72L15.4,1.54L12,3L8.6,1.54L6.71,4.72L3.1,5.53L3.44,9.21L1,12L3.44,14.78L3.1,18.47L6.71,19.29L8.6,22.47L12,21L15.4,22.46L17.29,19.28L20.9,18.46L20.56,14.78L23,12M10,17L6,13L7.41,11.59L10,14.17L16.59,7.58L18,9L10,17Z' fill='%234db2ec'></path></svg>") no-repeat center center;}
.social-links li a.fcb:before {
content:'';width:16px; height:16px; vertical-align:middle; display:inline-block;transition:all 0.3s ease; background: url("data:image/svg+xml,<svg viewBox='0 0 24 24' xmlns='http://www.w3.org/2000/svg'><path d='M17,2V2H17V6H15C14.31,6 14,6.81 14,7.5V10H14L17,10V14H14V22H10V14H7V10H10V6A4,4 0 0,1 14,2H17Z' fill='%23000'></path></svg>") no-repeat center center;}
.social-links li a.twt:before {
content:'';width:20px; height:20px; vertical-align:middle;display:inline-block;transition:all 0.3s ease;
background: url("data:image/svg+xml,<svg viewBox='0 0 24 24' xmlns='http://www.w3.org/2000/svg'><path d='M22.46,6C21.69,6.35 20.86,6.58 20,6.69C20.88,6.16 21.56,5.32 21.88,4.31C21.05,4.81 20.13,5.16 19.16,5.36C18.37,4.5 17.26,4 16,4C13.65,4 11.73,5.92 11.73,8.29C11.73,8.63 11.77,8.96 11.84,9.27C8.28,9.09 5.11,7.38 3,4.79C2.63,5.42 2.42,6.16 2.42,6.94C2.42,8.43 3.17,9.75 4.33,10.5C3.62,10.5 2.96,10.3 2.38,10C2.38,10 2.38,10 2.38,10.03C2.38,12.11 3.86,13.85 5.82,14.24C5.46,14.34 5.08,14.39 4.69,14.39C4.42,14.39 4.15,14.36 3.89,14.31C4.43,16 6,17.26 7.89,17.29C6.43,18.45 4.58,19.13 2.56,19.13C2.22,19.13 1.88,19.11 1.54,19.07C3.44,20.29 5.7,21 8.12,21C16,21 20.33,14.46 20.33,8.79C20.33,8.6 20.33,8.42 20.32,8.23C21.16,7.63 21.88,6.87 22.46,6Z' fill='%23000'></path></svg>") no-repeat center center;}
.social-links li a.wa:before {content:'';width:20px; height:20px; vertical-align:middle; display:inline-block;transition:all 0.3s ease; background: url("data:image/svg+xml,<svg viewBox='0 0 24 24' xmlns='http://www.w3.org/2000/svg'><path d='M7.8,2H16.2C19.4,2 22,4.6 22,7.8V16.2A5.8,5.8 0 0,1 16.2,22H7.8C4.6,22 2,19.4 2,16.2V7.8A5.8,5.8 0 0,1 7.8,2M7.6,4A3.6,3.6 0 0,0 4,7.6V16.4C4,18.39 5.61,20 7.6,20H16.4A3.6,3.6 0 0,0 20,16.4V7.6C20,5.61 18.39,4 16.4,4H7.6M17.25,5.5A1.25,1.25 0 0,1 18.5,6.75A1.25,1.25 0 0,1 17.25,8A1.25,1.25 0 0,1 16,6.75A1.25,1.25 0 0,1 17.25,5.5M12,7A5,5 0 0,1 17,12A5,5 0 0,1 12,17A5,5 0 0,1 7,12A5,5 0 0,1 12,7M12,9A3,3 0 0,0 9,12A3,3 0 0,0 12,15A3,3 0 0,0 15,12A3,3 0 0,0 12,9Z' fill='%23000'></path></svg>") no-repeat center center;}
.social-links li a.igicon:before {content:'';width:20px; height:20px; vertical-align:middle; display:inline-block;transition:all 0.3s ease; background: url("data:image/svg+xml,<svg viewBox='0 0 24 24' xmlns='http://www.w3.org/2000/svg'><path d='M20,8L12,13L4,8V6L12,11L20,6M20,4H4C2.89,4 2,4.89 2,6V18A2,2 0 0,0 4,20H20A2,2 0 0,0 22,18V6C22,4.89 21.1,4 20,4Z' fill='%23000'></path></svg>") no-repeat center center;}
.social-links li a.ytb:before {content:'';width:20px; height:20px; vertical-align:middle; display:inline-block;transition:all 0.3s ease; background: url("data:image/svg+xml,<svg viewBox='0 0 24 24' xmlns='http://www.w3.org/2000/svg'><path d='M3.42,12C3.42,10.76 3.69,9.58 4.16,8.5L8.26,19.72C5.39,18.33 3.42,15.4 3.42,12M17.79,11.57C17.79,12.3 17.5,13.15 17.14,14.34L16.28,17.2L13.18,8L14.16,7.9C14.63,7.84 14.57,7.16 14.11,7.19C14.11,7.19 12.72,7.3 11.82,7.3L9.56,7.19C9.1,7.16 9.05,7.87 9.5,7.9L10.41,8L11.75,11.64L9.87,17.27L6.74,8L7.73,7.9C8.19,7.84 8.13,7.16 7.67,7.19C7.67,7.19 6.28,7.3 5.38,7.3L4.83,7.29C6.37,4.96 9,3.42 12,3.42C14.23,3.42 16.27,4.28 17.79,5.67H17.68C16.84,5.67 16.24,6.4 16.24,7.19C16.24,7.9 16.65,8.5 17.08,9.2C17.41,9.77 17.79,10.5 17.79,11.57M12.15,12.75L14.79,19.97L14.85,20.09C13.96,20.41 13,20.58 12,20.58C11.16,20.58 10.35,20.46 9.58,20.23L12.15,12.75M19.53,7.88C20.2,9.11 20.58,10.5 20.58,12C20.58,15.16 18.86,17.93 16.31,19.41L18.93,11.84C19.42,10.62 19.59,9.64 19.59,8.77L19.53,7.88M12,2A10,10 0 0,1 22,12A10,10 0 0,1 12,22A10,10 0 0,1 2,12A10,10 0 0,1 12,2M12,21.54C17.26,21.54 21.54,17.26 21.54,12C21.54,6.74 17.26,2.46 12,2.46C6.74,2.46 2.46,6.74 2.46,12C2.46,17.26 6.74,21.54 12,21.54Z' fill='%23000'></path></svg>") no-repeat center center;
}
    width: 96px;
    float: left;
    margin-right: 15px;
}
.author-profile > span {
    font-size: 14px;
    color: #222;
}
.author-profile a.g-profile {
 font-weight: 500;
    color: #333333;
    font-size: 15px;
    margin-bottom: 5px;
    display: inline-block;
}
.author-profile a.g-profile:after {
    content: "\f058";
    font-family: FontAwesome;
    font-style: normal;
    font-weight: 700;
    font-size: 12px;
    text-decoration: inherit;
    padding-right: 4px;
    color: #55ACEE;
}
.web-author-url a:hover, .author-profile a.g-profile:hover {
 color: #0066cc;
}
.web-author-url {
    font-size: 11px;
    font-style: italic;
    line-height: 21px;
    margin-bottom: 6px;
}
.web-author-url a {
    color: #444;
}
.author-social {
    margin-bottom: -5px;
}
.social-links li {
    list-style: none!important;
    float:left;
}
.social-links a {
    border-bottom:none;
}
.social-links li a {
    font-size: 18px;
    color: #222;
    width: auto;
    min-width: 18px;
    height: auto;
    margin-right: 15px;
}
.social-links li a:hover {
    color: #666666;
}
.social-links li a.fcb:hover {
 color:#3b5998;
}
.social-links li a.twt:hover {
 color:#1BB2E9;
}
.social-links li a.ytb:hover {
 color:#ED3F41;
}
.social-links li a.wa:hover {
 color:#25d366;
}
.social-links li a.igicon:hover {
 color:#527fa4;
}

@media only screen and (max-width:800px) {
.author-profile img {
        width: 76px;
        float: none;
        margin: 0;
        text-align: center;
    }
    .author-social, .author-profile {
    text-align: center;
}
    .social-links li {
    display: inline-block;
    float: none;
}

Add This CSS Under </style>
or </:b skin>

After that, copy the HTML code in the box below.


<div class='author-profile' itemprop='author' itemscope='itemscope' itemtype='https://schema.org/Person'>
<img class='lazy' src='https://encrypted-tbn0.gstatic.com/images?q=tbn%3AANd9GcQxVGRSs4AQi3Kz-qqZUuk9cK0BdYsAmWOfA_EZeCEjc_SNdUY4' itemprop='image' width='90px'/>
<div>
<a class='g-profile' href='https://github.com/lidesign' itemprop='url' rel='author' title='author profile'>
<span itemprop='name'>Easy Tricks</span>
</a>
</div>
<div class='web-author-url'>
<a href='/' itemprop='url' rel='blog' title='author blog'>https://easytrks.blogspot.com/</a>
</div>
<span itemprop='description'>I am the author's editor of this blog, and really like writing and also reading information about the world of the Internet.</span>
<div class='author-social' itemprop='author' itemscope='itemscope' itemtype='https://schema.org/Organization'>
<span class='social-links'>
<li><a class='fcb' href='https://www.facebook.com/bthemebd' rel='nofollow' target='_blank' title='Facebook'></a></li>
<li><a class='twt' href='https://twitter.com/LimonMostafa' rel='nofollow' target='_blank' title='Twitter'></a></li>
<li><a class='wa' href='https://id.pinterest.com/nmlbd' rel='nofollow' target='_blank' title='Vimeo'></a></li>
<li><a class='igicon' href='https://google.com' rel='nofollow' target='_blank' title='VKontake'></a></li>
<li><a class='ytb' href='https://www.youtube.com/#' rel='nofollow' target='_blank' title='Youtobe'></a></li>
</span>
</div>
</div>

Place this HTML code in the <div class = 'post-footer'> section, usually each blogger template is different, just look for something similar to the code <div class = 'post-footer'>.

The Result Will Be Like This


Note! Don't Forget To Change The Social Links With your Own Links. It Is Very Important .
Thanks .

This Post Is Based On Bosjin Blog author section . 

Make A Cool Author Box Under Blogger Posts

Make A Cool Author Box Under Blogger Posts

Hello Bloggers Today I Am Going To Show You How To Add A Cool Social Media Widget On Blogger.

So Follow The Article. 

1st Method :

Go To Blogger.com > Theme > Edit Html > Add The Css Code Before </style>

#socialblock{overflow:hidden;margin:0 0 10px 0}
#socialblock h2{margin:0 auto 4px auto}
#socialblock .vam_social{margin-left:-.5%;margin-right:-.5%}
#socialblock .vam_social:before,.vam_social:after{content:"";display:table}
#socialblock .vam_social:after{clear:both}
#socialblock .vam_social .scl_social{margin:0 .5% 1%;width:32.3%;float:left;text-align:center;background:#111;border:1px solid rgba(0,0,0,0.03);transition:all .3s}
#socialblock .vam_social .scl_social.facebookx{background:#3e64ad}#socialblock .vam_social .scl_social.twitterx{background:#58ccff}#socialblock .vam_social .scl_social.bloggerx{background:#f79738}#socialblock .vam_social .scl_social.instagramx{background:#4d749f}#socialblock .vam_social .scl_social.googlex{background:#dd4b39}#socialblock .vam_social .scl_social.youtubex{background:#e62119}
#socialblock .vam_social .scl_social.facebookx:hover{background:#2d4980}#socialblock .vam_social .scl_social.twitterx:hover{background:#4aaeda}#socialblock .vam_social .scl_social.bloggerx:hover{background:#d78432}#socialblock .vam_social .scl_social.instagramx:hover{background:#3c5d81}#socialblock .vam_social .scl_social.googlex:hover{background:#bf3c2c}#socialblock .vam_social .scl_social.youtubex:hover{background:#c71f18}
#socialblock .vam_social .scl_social a{position:relative;overflow:hidden;display:block;color:#fff;padding:22px 5px}
#socialblock .vam_social .scl_social a:before{content:'';position:absolute;left:0;right:0;bottom:0;top:0;background-image:linear-gradient(150deg,rgba(0,0,0,0.02) 45%,rgba(255,255,255,.12) 45%);transition:all .6s}
#socialblock .vam_social .scl_social:hover a:before{transform:rotate(-30deg) scale(1.3);}
#socialblock .vam_social .scl_social span{display:block}
#socialblock .vam_social .scl_social span.app_icon i{font-size:24px;margin-bottom:5px}
#socialblock .vam_social .scl_social span.app_type{font-size:13px;margin:5px auto 0 auto}
#socialblock h2,#Label1 h2{background:#1abc9c}

After  Adding The Css > Add This Html Code Where You Wanna Install The Widget.


<div id='socialblock'>
<div class='vam_social'>
<div class='scl_social facebookx'>
<a href='fb.com/myabdurrahim.id' rel='nofollow' target='_blank' title='Like our Facebook'>
<span class='app_icon'><i class='fa fa-facebook'></i></span>
<span class='app_type'>Facebook</span>
</a>
</div>
<div class='scl_social twitterx'>
<a href='twitter.com/abdurrahim_ID' rel='nofollow' target='_blank' title='Follow our Twitter'>
<span class='app_icon'><i class='fa fa-twitter'></i></span>
<span class='app_type'>Twitter</span>
</a>
</div>
<div class='scl_social bloggerx'>
<a href='https://www.blogger.com/follow-blog.g?blogID=7216711388501110503' rel='nofollow' target='_blank' title='Join our Site'>
<span class='app_icon'><i class='fa fa-user'></i></span>
<span class='app_type'>Blogger</span>
</a>
</div>
<div class='scl_social googlex'>
<a href='https://plus.google.com/u/0/110857132806605497220' rel='nofollow' target='_blank' title='Get in touch'>
<span class='app_icon'><i class='fa fa-google-plus'></i></span>
<span class='app_type'>Google+</span>
</a>
</div>
<div class='scl_social instagramx'>
<a href='instagram.com/abdurrahim_id' rel='nofollow' target='_blank' title='Follow our Instagram'>
<span class='app_icon'><i class='fa fa-instagram'></i></span>
<span class='app_type'>Instagram</span>
</a>
</div>
<div class='scl_social youtubex'>
<a href='https://www.youtube.com/channel/UCnUzeQMof2aHNJOveCY9eWQ' rel='nofollow' target='_blank' title='Visit our Channel'>
<span class='app_icon'><i class='fa fa-youtube'></i></span>
<span class='app_type'>Youtube</span>
</a>
</div>
</div>
</div>

2nd Method :

This Is Easy Method. Just Go To Blogger > Layout > Add Widget > Html / Javascript & Add The Code.


<style type='text/css'>
/* css by EasyTrks*/
#socialblock{overflow:hidden;margin:0 0 10px 0}
#socialblock h2{margin:0 auto 4px auto}
#socialblock .vam_social{margin-left:-.5%;margin-right:-.5%}
#socialblock .vam_social:before,.vam_social:after{content:"";display:table}
#socialblock .vam_social:after{clear:both}
#socialblock .vam_social .scl_social{margin:0 .5% 1%;width:32.3%;float:left;text-align:center;background:#111;border:1px solid rgba(0,0,0,0.03);transition:all .3s}
#socialblock .vam_social .scl_social.facebookx{background:#3e64ad}#socialblock .vam_social .scl_social.twitterx{background:#58ccff}#socialblock .vam_social .scl_social.bloggerx{background:#f79738}#socialblock .vam_social .scl_social.instagramx{background:#4d749f}#socialblock .vam_social .scl_social.googlex{background:#dd4b39}#socialblock .vam_social .scl_social.youtubex{background:#e62119}
#socialblock .vam_social .scl_social.facebookx:hover{background:#2d4980}#socialblock .vam_social .scl_social.twitterx:hover{background:#4aaeda}#socialblock .vam_social .scl_social.bloggerx:hover{background:#d78432}#socialblock .vam_social .scl_social.instagramx:hover{background:#3c5d81}#socialblock .vam_social .scl_social.googlex:hover{background:#bf3c2c}#socialblock .vam_social .scl_social.youtubex:hover{background:#c71f18}
#socialblock .vam_social .scl_social a{position:relative;overflow:hidden;display:block;color:#fff;padding:22px 5px}
#socialblock .vam_social .scl_social a:before{content:'';position:absolute;left:0;right:0;bottom:0;top:0;background-image:linear-gradient(150deg,rgba(0,0,0,0.02) 45%,rgba(255,255,255,.12) 45%);transition:all .6s}
#socialblock .vam_social .scl_social:hover a:before{transform:rotate(-30deg) scale(1.3);}
#socialblock .vam_social .scl_social span{display:block}
#socialblock .vam_social .scl_social span.app_icon i{font-size:24px;margin-bottom:5px}
#socialblock .vam_social .scl_social span.app_type{font-size:13px;margin:5px auto 0 auto}
#socialblock h2,#Label1 h2{background:#1abc9c}
/* www.easytrks.blogspot.com */
</style>

<div id='socialblock'>
<div class='vam_social'>
<div class='scl_social facebookx'>
<a href='https://fb.com/btemplatesBD' rel='nofollow' target='_blank' title='Like our Facebook'>
<span class='app_icon'><i class='fa fa-facebook'></i></span>
<span class='app_type'>Facebook</span>
</a>
</div>
<div class='scl_social twitterx'>
<a href='twitter.com/LimonMostafa' rel='nofollow' target='_blank' title='Follow our Twitter'>
<span class='app_icon'><i class='fa fa-twitter'></i></span>
<span class='app_type'>Twitter</span>
</a>
</div>
<div class='scl_social bloggerx'>
<a href='https://www.blogger.com/follow-blog.g?blogID=7216711388501110503' rel='nofollow' target='_blank' title='Join our Site'>
<span class='app_icon'><i class='fa fa-user'></i></span>
<span class='app_type'>Blogger</span>
</a>
</div>
<div class='scl_social googlex'>
<a href='https://plus.google.com/u/0/110857132806605497220' rel='nofollow' target='_blank' title='Get in touch'>
<span class='app_icon'><i class='fa fa-google-plus'></i></span>
<span class='app_type'>Google+</span>
</a>
</div>
<div class='scl_social instagramx'>
<a href='https://instagram.com/nm.limon' rel='nofollow' target='_blank' title='Follow our Instagram'>
<span class='app_icon'><i class='fa fa-instagram'></i></span>
<span class='app_type'>Instagram</span>
</a>
</div>
<div class='scl_social youtubex'>
<a href='https://www.youtube.com/channel/UCnUzeQMof2aHNJOveCY9eWQ' rel='nofollow' target='_blank' title='Visit our Channel'>
<span class='app_icon'><i class='fa fa-youtube'></i></span>
<span class='app_type'>Youtube</span>
</a>
</div>
</div>
</div>
Don't Forgot To Change The Social Links To Your Social Links. It's Very Important To Change Those Links.
Thank You. This Tutorial Is Based On Simplify 2 Blogger Template Social Widget. 
Social Media Widget For Blogger

Social Media Widget For Blogger


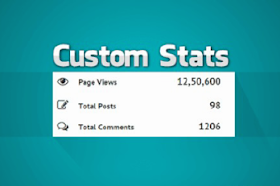
In this post, i am going to share with you custom stats blogger widget. By using this widget you can display total page views, total posts and total comments of your blog. Only blogger has total page views widget. After that time, i modify some css and added some script for total posts and total comments. The design of this widget is modern and clean. I used some icons using font awesome. Installing custom stats widget is very useful.

It is very unique and smart design. Some of friends requested me to share this blogger widgets. After that time now i am share this with new look and one more extra features. This blogger widgets help you to display Total page views, comments and total posts of your blog. People who want make their blog more attractive and beautiful, some blogger widgets make them easy. 

View Result

How to install custom stats blogger widget

Here is some very simple steps to installing custom stats blogger widget. In this blogger widget i used font awesome icons and PT Sans google font. So you have also need to adding These fonts on your blog. If font awesome already added on your blog. then ignore it.

Step 1: Go to Layout > Add a Gadget > Blog's Stats add this widget.

Install Custom Stats Widget for Blogger

Step 2: Now go to Edit HTML and find below codes.

<b:widget id='Stats1' locked='false' title='Custom Stats' type='Stats' version='1' visible='true'>...</b:widget>

Now replace this line with below codes.


<b:widget id='Stats1' locked='false' title='Custom Stats' type='Stats' version='1' visible='true'>
    <b:includable id='main'>
  <b:if cond='data:title'><h2><data:title/></h2></b:if>
  <div class='widget-content'>
    <!-- Content is going to be visible when data will be fetched from server. -->
    <div expr:id='data:widget.instanceId + &quot;_content&quot;' style='display: none;'>
      <!-- Counter and image will be injected later via AJAX call. -->
      <b:if cond='data:showSparkline'>
        <img alt='Sparkline' expr:id='data:widget.instanceId + &quot;_sparkline&quot;' height='30' src='http://2.bp.blogspot.com/-nsxCtkYnchQ/VLEifAyf97I/AAAAAAAAIlk/9Viyy0W9r04/s1600/FFF.png' title='Sparkline' width='75'/>
      </b:if>
      <b:if cond='data:showGraphicalCounter'>
        <span class='counter-wrapper graph-counter-wrapper' expr:id='data:widget.instanceId + &quot;_totalCount&quot;'/>
      <b:else/>
        <span class='counter-wrapper text-counter-wrapper' expr:id='data:widget.instanceId + &quot;_totalCount&quot;'/>
      </b:if>
<script type='text/javascript'>
function postCount(json){
document.write(&quot;<span class='counts post2'> Total Posts &quot;);
var count = json.feed.openSearch$totalResults.$t;
document.write(&quot;<span class='count'>&quot; + count + &quot;</span>&quot;);
document.write(&quot;</span>&quot;)
}

function numberOfComments(json){
document.write(&quot;<span class='counts comment'> Total Comments &quot;);
var count = json.feed.openSearch$totalResults.$t;
document.write(&quot;<span class='count'>&quot; + count + &quot;</span>&quot;);
document.write(&quot;</span>&quot;)
}

</script>
<script src='/feeds/posts/default?alt=json-in-script&amp;amp;max-results=0&amp;amp;callback=postCount' type='text/javascript'/>
<script src='/feeds/comments/default?alt=json-in-script&amp;amp;max-results=0&amp;amp;callback=numberOfComments'/>


    </div>
  </div>
</b:includable>
  </b:widget>

You're 80% done. Now paste all below CSS Codes befor </head>

<link href='//fonts.googleapis.com/css?family=PT+Sans:400,700' rel='stylesheet' type='text/css'/>
<link href='//maxcdn.bootstrapcdn.com/font-awesome/4.5.0/css/font-awesome.min.css' rel='stylesheet'/> 
<style type='text/css'>
/* Blogger Custom Stats widget by msdesignbd.com */
.Stats img {display:none!important;background-image:none;}
.Stats .counter-wrapper {width:92%;text-align:right;margin:10px;line-height:35px;color:#333;font-weight:700;font-size:16px;margin-left: 0;}
.Stats .counter-wrapper:after {content:&quot;Page Views&quot;;float:left;text-align:left;font-size:13px;font-weight:700;color:#333;}
.counts {display:inline-block;width:92%;font-size:13px;line-height:35px;color:#333;font-weight:700;}
.counts .count {display:inline-block;font-size:16px;height:30px;
vertical-align:top;direction:ltr;float:right;color:#333;font-weight:700!important;}
.counts:hover .titles:before {color:#333!important;border-radius:2px;border-color:rgba(255,255,255,0.1);}
.counter-wrapper.text-counter-wrapper:before, .counts:before {display:inline-block;font-size:13px;font-family:FontAwesome;font-style:normal;font-weight:normal;margin:0 10px 0 10px;float:left;width:10px;text-align:center;}
.counter-wrapper.text-counter-wrapper:before, .counts:before {
display:block;background-color:#fff;color:#333;width:35px;height:35px;font-size:18px;line-height:35px;border-radius:2px;margin:0px 8px 0 0;}
.counter-wrapper.text-counter-wrapper:before {content:&quot;\f06e&quot;;}
.counts.post2:before {content:&quot;\f044&quot;;}
.counts.comment:before {content:&quot;\f0e6&quot;;}
#Stats1_content {width:auto;height:auto;background-color:#fff;}
</style>

You're done. Now Save template and see result by refreshing page.

Hope you understand that, how to add custom stats blogger widgets on blog or blogger site. If you have any problem, then feel free to communicate by comment box. If you like this widget, then don't forget to share this post with your social media. Your support is our future. Thanks.  
Install Custom Stats Widget for Blogger

Install Custom Stats Widget for Blogger

Hello! Welcome To EasyTrks. Today I Will Show You How To Make A Partner Widget On Blogger Or Wapkiz.


First Go To Blogger & Add This Css Code Before </style>

For Wapkiz Go To Panel Mode > Css Theme > Scroll Down > Add New With Editor & Add This Code. 

/* Partner Widget */
.my-partner-wd {text-align: center;}
.my-partner-wd img {margin:0px 5px 5px 0px;padding:5px;text-align:center;border:1px solid #ddd;}
.my-partner-wd img:hover {border:1px solid #aaa}
.my-partner-wd img.noborder {border:0;}

After Adding The Css Code You Just Need To Add The Html Where You Wanna Install The Partner Widget.


<div class="my-partner-wd">
<a href="PARTNER-URL" title="PARTNER-TITLE"><img class="noborder" src="PARTNER-IMG-URL" alt="PARTNER-IMG-ALT" width="125" height="125" /></a>
<a href="PARTNER-URL" title="PARTNER-TITLE"><img class="noborder" src="PARTNER-IMG-URL" alt="PARTNER-IMG-ALT" width="125" height="125" /></a> 
</div>

Edit
PARTNER-URL : Partner Blog/Website Url
PARTNER-TITLE : Partner web/blog Title
PARTNER-IMG-URL : Partner Img Banner
IMAGE SIZE : Partner Img Size (As you)

Then save your widget.

I don't think it's difficult to create an ad box on a blog, just need to add some code to the blog template. For that I just end the tutorial on How to make a partner widget on blogger. May be useful.

How To Add Partner Widget On Blogger Or Wapkiz

How To Add Partner Widget On Blogger Or Wapkiz

Subscribe To Our Newsletter